WOD:
6 Rounds:
20 Cal Row
20 Hang Power Snatch (95/65)
20 Pull Ups
Scaling Options:
Bar weight -> as needed
Pull Ups -> seated bar pull up* ->body row
For seated bar pull ups (video courtesy of Cass Gellegos)…

Scaling Options:
Bar weight -> as needed
Pull Ups -> seated bar pull up* ->body row
For seated bar pull ups (video courtesy of Cass Gellegos)…
based on 13Dec 1RM
Video courtesy of Catalyst Athletics. Pull from the ground like a normal clean, pause right below the knee for 2 seconds (one-one thousand, two-one thousand), then continue pull, and EXPLODE when you hit mid-thigh. DO NOT lose tension in the pause. You can drop the bar between reps.
then…
Video courtesy of Formula Performance and Wellness. Quick demo on Sandbag ground to over the shoulder.
Video courtesy of Sanctify Fitness. Toe to Rings are the same style movement as Toe 2 Bar, just with rings instead of a pull up bar. Goal is tips of the toes right through the rings.
Scaling Options:
DU -> Attempts through 100 rope contacts -> 75 penguin jumps
Toe2Ring -> knee ups on rings
Sandbag weight -> as needed or go to med ball

No class today. See you guys at normal time on Tuesday!
based on 13Dec 1RM
Video courtesy of Catalyst Athletics. So, set up like a normal snatch, begin first pull, then pause at the knee for 2 seconds (one-one thousand, two-one thousand), DO NOT LOSE TENSION in this position. End of 2 seconds, continue pull, at mid thigh, EXPLODE!, then drop under the bar and catch at the bottom of the OH squat.
Scaling Options:
Ring Dips -> Stationary dip -> box dips
WB -> 14/12
DU -> DU attempts through 25 rope contacts
Increase weight ea set
Our squat version for this cycle will be the High Bar Back Squat. This version translates best to improving our Olympic lifts as we focuse on keeping the torso as upright as possible. Bar placement is slightly different. See here for the difference in position between high bar and low bar(video courtesy of Barbell Shrugged)
| Every time you come back to the Power Cleans, the goal is to increase weight. Therefore, choose your jumps wisely. |
Scaling Options:
N/A
Scaling Options:
DUs-> 2X SUs
Run -> 250, 500, 740, 1000, 1250M row
| Key to this one is to keep moving the whole time! Find a pace that will allow this to happen. |
Increase weight ea set
| Good ol’ fashioned Deadlifts for our pull movement this cycle. Keep a tight core throughout. Make sure hips and shoulders rise at the same time from the ground. |
Scaling Options:
Bar weight -> as needed
BBJO -> 20/16
Merry Christmas from the coaching staff at Joint Strike CrossFit! See you back in here Tuesday!
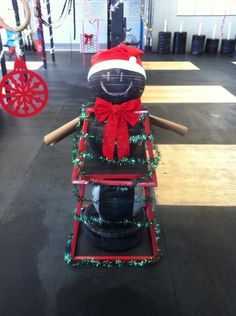
Pic courtesy of Mercer Island CrossFit. Time for the annual 12-Day-Of-Christmas WOD!!!! (extra points if you do it with a Santa hat on)
Like the song the “12 Days of Christmas,” complete each exercise in ascending order then work back down to 1, adding one exercise per round. Like this: 1 SDHP; 2 Thrusters-1 SDHP; 3 Push Press-2 Thrusters-1 SDHP etc – for a total of 364 reps.
Scaling Options:
Bar weight -> as needed, but keep same weight for all bar movements
KB -> as needed
Pull Ups -> body rows
T2B -> hanging knee raise
BJ -> 20/16
Plate weight -> as needed
DUs – 20 SUs
Increase weight ea set
Video courtesy of CrossFit HQ. Some good words of wisdom from Coach B. One of the biggest benfits of Behind The Neck Split Jerk is the translation of bar position to our regular split jerk. When you land a jerk, the bar should be right over the shoulders and hips. Going from BTN allows our body to get comfortable with that position as it starts in that spot right away. Just stand all the way up between reps and do not drop the bar too quickly on the shoulders. Also, as the bar makes contact with the shoulders, bend the knees to absorb the shock. Be careful to not land the bar on the neck.
No pause between sections. Once you finish the first 4 rounder, go right into the 3-rounder, then right into the 2 rounder
Scaling Options:
Bar weight -> as needed
